How to get Started making your Home Super ‘Smart’.
Home Automation is no longer the domain of those with big budget and highly skilled individuals to programme, install and configure your system.
With the advent of the Smart Home platform from Tuya Industries, making your home ‘Smart’ is now truly DIY. (Note that where applicable work is to be carried out by a qualified electrician in possession of required electrical approved license per state requirement.
We also suggest you purchase at least one of the products below: [click on the product image]. The Wireless Wall Plug adaptor requires absolutely no wiring. Simply plug> configure> play.
Step 1: Using your mobile phone scan the QR code to the right or via the Google Play or Apple iStore search for the app called ‘smartlife’ & install the app. The app has the ‘Blue Smart House’ icon. (once installed the process does not have to be repeated)



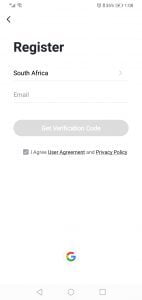
Step 2: Open the App & Create an account. Enter your phone number or email address and then request a verification code and create your password
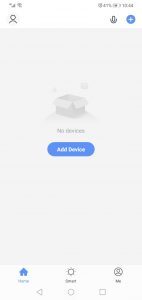
Step 3: Add device Tap “+” on the top right corner. A list of potential products appears.
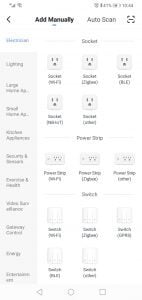
Step 4: Select the device type you want to add from the available list there are multiple categories to choose from:

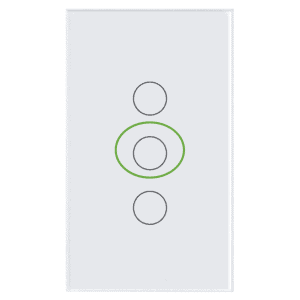
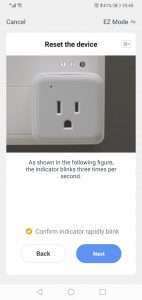
Step 5: All Tuya products are ‘default pairing mode’ when first switched ON or plugged in – pairing mode is shown be the LED flashing quickly. If not in pairing mode, press the devices reset button for 5 seconds or switch the device on & off 3 times until it flashes (e.g. light bulbs or strips). Note for light switches select the 2 gang button to pair (as a reset button) Most smart devices have a clear reset button that must be pressed to enable pairing mode and is stipulated in the provided user manual. A device with no visible buttons will be automatically in pairing mode if not paired to any device: Some examples are shown Below:
Step 7: Confirm your phone is connected to your Wi-Fi network to which the device will be added, enter your Wi-Fi password and confirm.
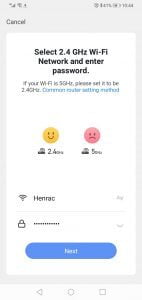

Step 8: Confirm that the indicator light it rapidly blinking and proceed to the following page witch will pair the device to your SmartHome
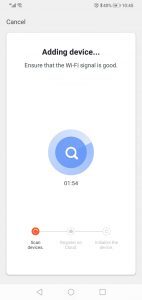
Step 9: The device will pair to your application. the device will be added within 120sec. If faild check you WiFi details and the confirm the boards ‘blue LED is flashing rapidly.

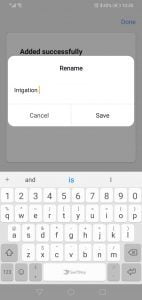
Step 10: After the product is found and added, rename it so you can easily recognize it and use that name for voice commands. Example kitchen lights, pool pump, kettle etc.

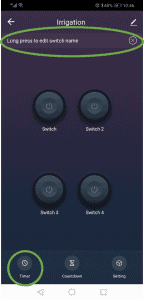
Step 10: add a schedule that can start and end times on days of the week etc. also note switch and zone names can be changed by a long press. Click the timer button at the bottom to get started with running schedules

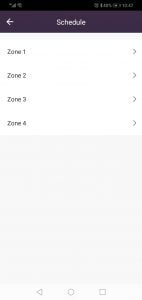
Step 11: select your zone, lights, areas, switches ect that you would like to activate on a schedule

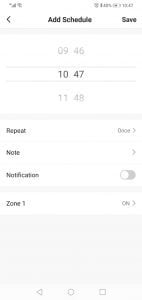
Step 12: select your times and notification of activation here. then select repeat to set days of the week you would like this schedule to run

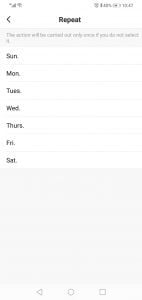
Step 13: select the days that you would like the schedule to run, explore the app and have fun!

| Cookie | Duration | Description |
|---|---|---|
| cookielawinfo-checkbox-analytics | 11 months | This cookie is set by GDPR Cookie Consent plugin. The cookie is used to store the user consent for the cookies in the category "Analytics". |
| cookielawinfo-checkbox-functional | 11 months | The cookie is set by GDPR cookie consent to record the user consent for the cookies in the category "Functional". |
| cookielawinfo-checkbox-necessary | 11 months | This cookie is set by GDPR Cookie Consent plugin. The cookies is used to store the user consent for the cookies in the category "Necessary". |
| cookielawinfo-checkbox-others | 11 months | This cookie is set by GDPR Cookie Consent plugin. The cookie is used to store the user consent for the cookies in the category "Other. |
| cookielawinfo-checkbox-performance | 11 months | This cookie is set by GDPR Cookie Consent plugin. The cookie is used to store the user consent for the cookies in the category "Performance". |
| viewed_cookie_policy | 11 months | The cookie is set by the GDPR Cookie Consent plugin and is used to store whether or not user has consented to the use of cookies. It does not store any personal data. |